


Welcome, fellow readers! Today, we’re reporting from 2023, where AI tool assistants have revolutionized how we develop software.
Unless you’ve been living on another planet without an internet connection for a while, you have already heard about the AI boom and the multiple options we have now to assist our job as developers. Speaking with colleagues, I found different attitudes towards this new trend, varying from loving how these tools “program as they were reading your mind” to being reluctant to the idea of “a machine typing the code I should author”.
I’m still in the process of making sense of all these new creations. We should adapt our way of crafting software to employ the latest tools available. The real challenge now is to discover the pattern or habit that could make us - programmers - the most effective and productive we can be. Therefore, my preponderant attitude towards AI assistants is curiosity. I want to experiment with things to understand better what works better.
Let’s experiment
I took one of my programming tasks as an experimental field. This initial post will describe it and report the first steps in working on it. There is a Part 2 wrapping up the activity. A third article is available, reflecting on the whole programming process and thinking about how AI tools can better assist developers.
I utilized a pair of the most popular tools: GitHub Copilot and ChatGPT. In particular, I have access to version 4 of ChatGPT with web browsing available (in beta at the time of writing this). It was not the first time I used these tools, but I was programming most of the time in other languages. I wanted to know how it looks to create new stuff in Phoenix LiveView and how well it plays with Elixir.
Starting a new component
Following one piece of advice given by the ChatGPT best practices, I wrote one initial request to this tool explaining what to do, including some steps and a basic example: I wanted to implement a calendar widget similar to vue-date-pick. Here I’m relying on the beta feature of the tool, where it can browse the internet. Also, I specified the tech stack to use by pointing to the documentation of LiveView components.
Then, I provided a limited scope to the initial response because expecting a fully detailed implementation in one shoot is impractical. I completed my initial request with a list of steps, each one including short requirements and expectations:
- Create the LiveComponent module file. It could be named CalendarDatePicker.
- Provide an initial HTML markup in Heex format, as required for the
renderfunction. - Give an implementation displaying only the current month. The arrow buttons to change months will be working later. Also, let’s work on responding to hover/click mouse actions later.
Here is some pics for the responses to steps 1 & 2:
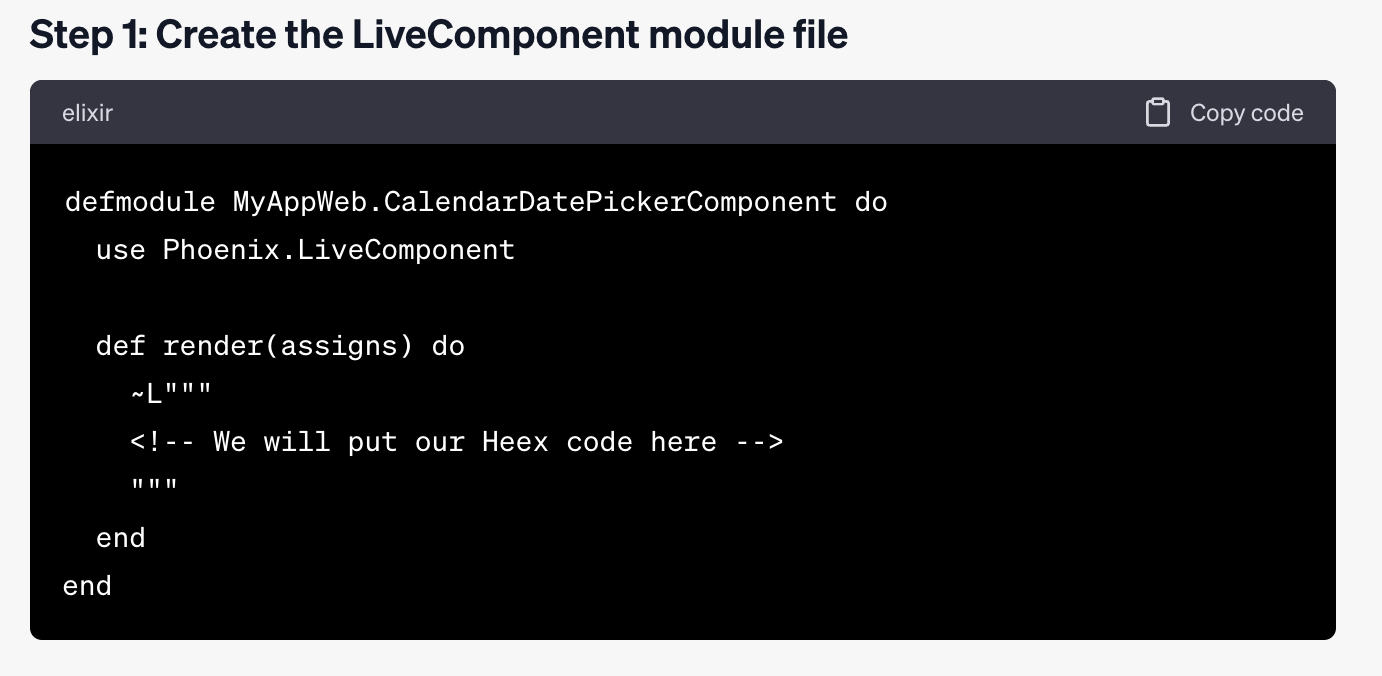 Well, it’s an start. Let’s see the following responses.
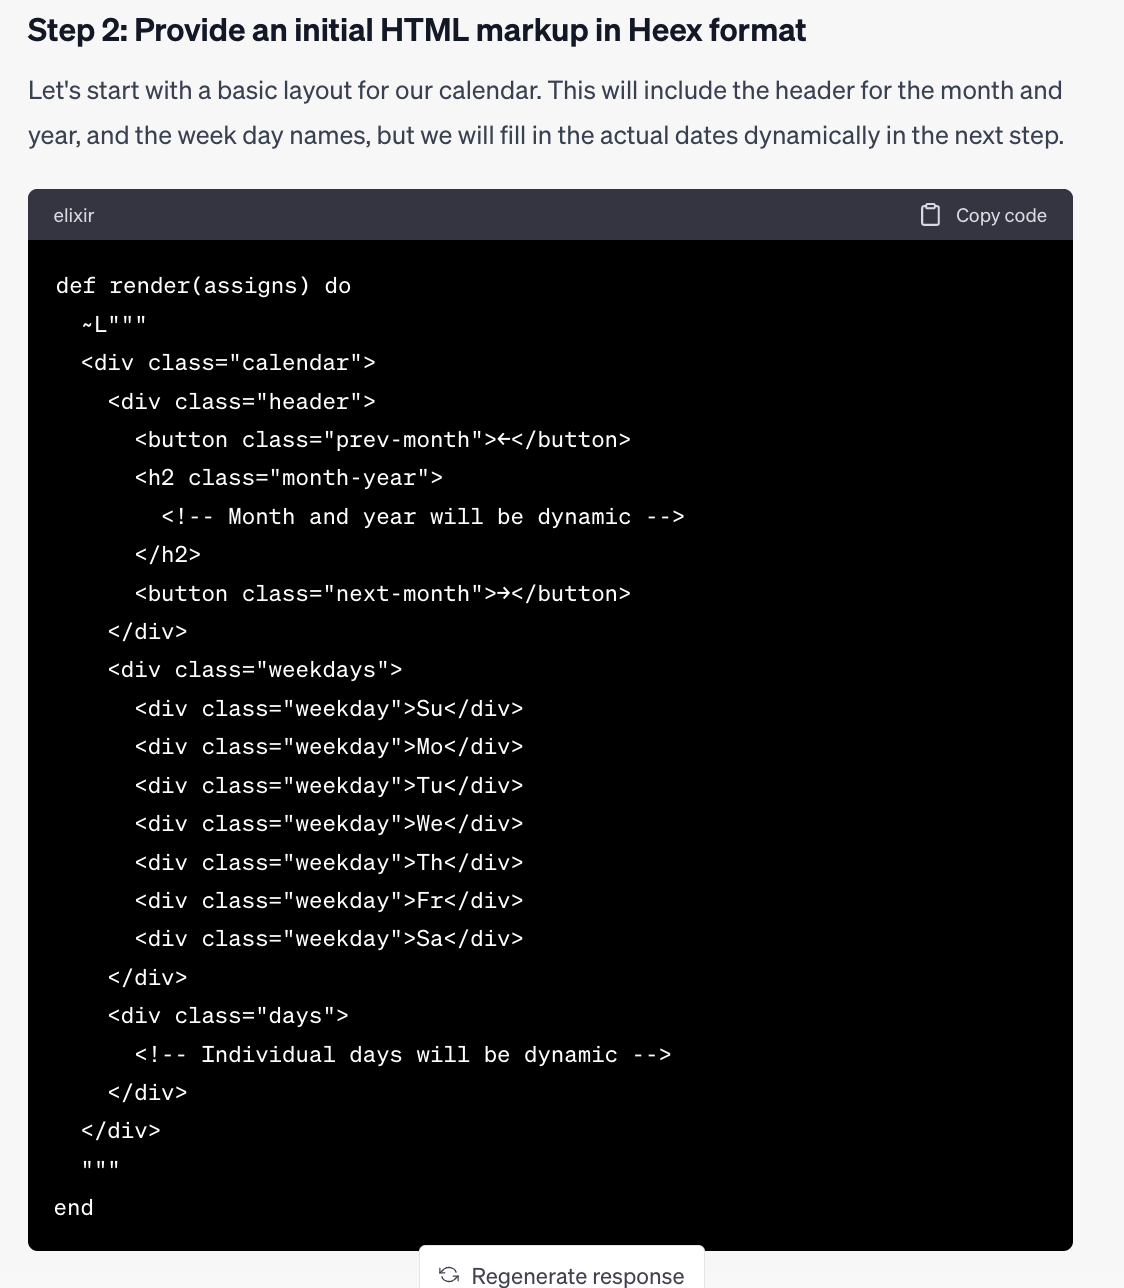 We probably save some time and energy having this initial markup available!
The response to step 3 is more comprehensive because it includes some initial code snippets. Still, it navigates the internet, a process where you see some visual indication of the progress as it goes, providing an updated version of the code. The following is part of the final response:
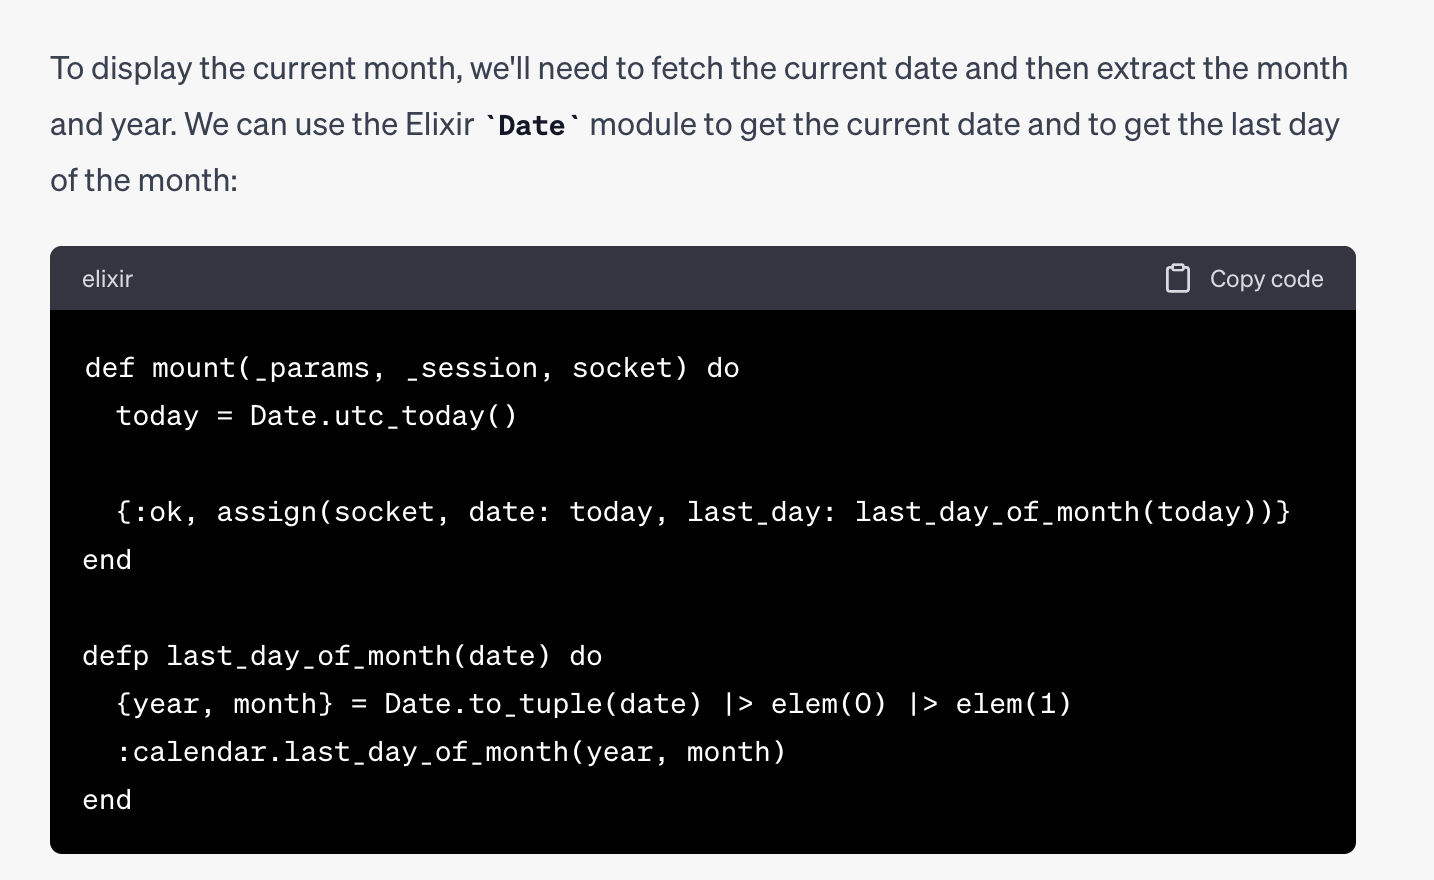
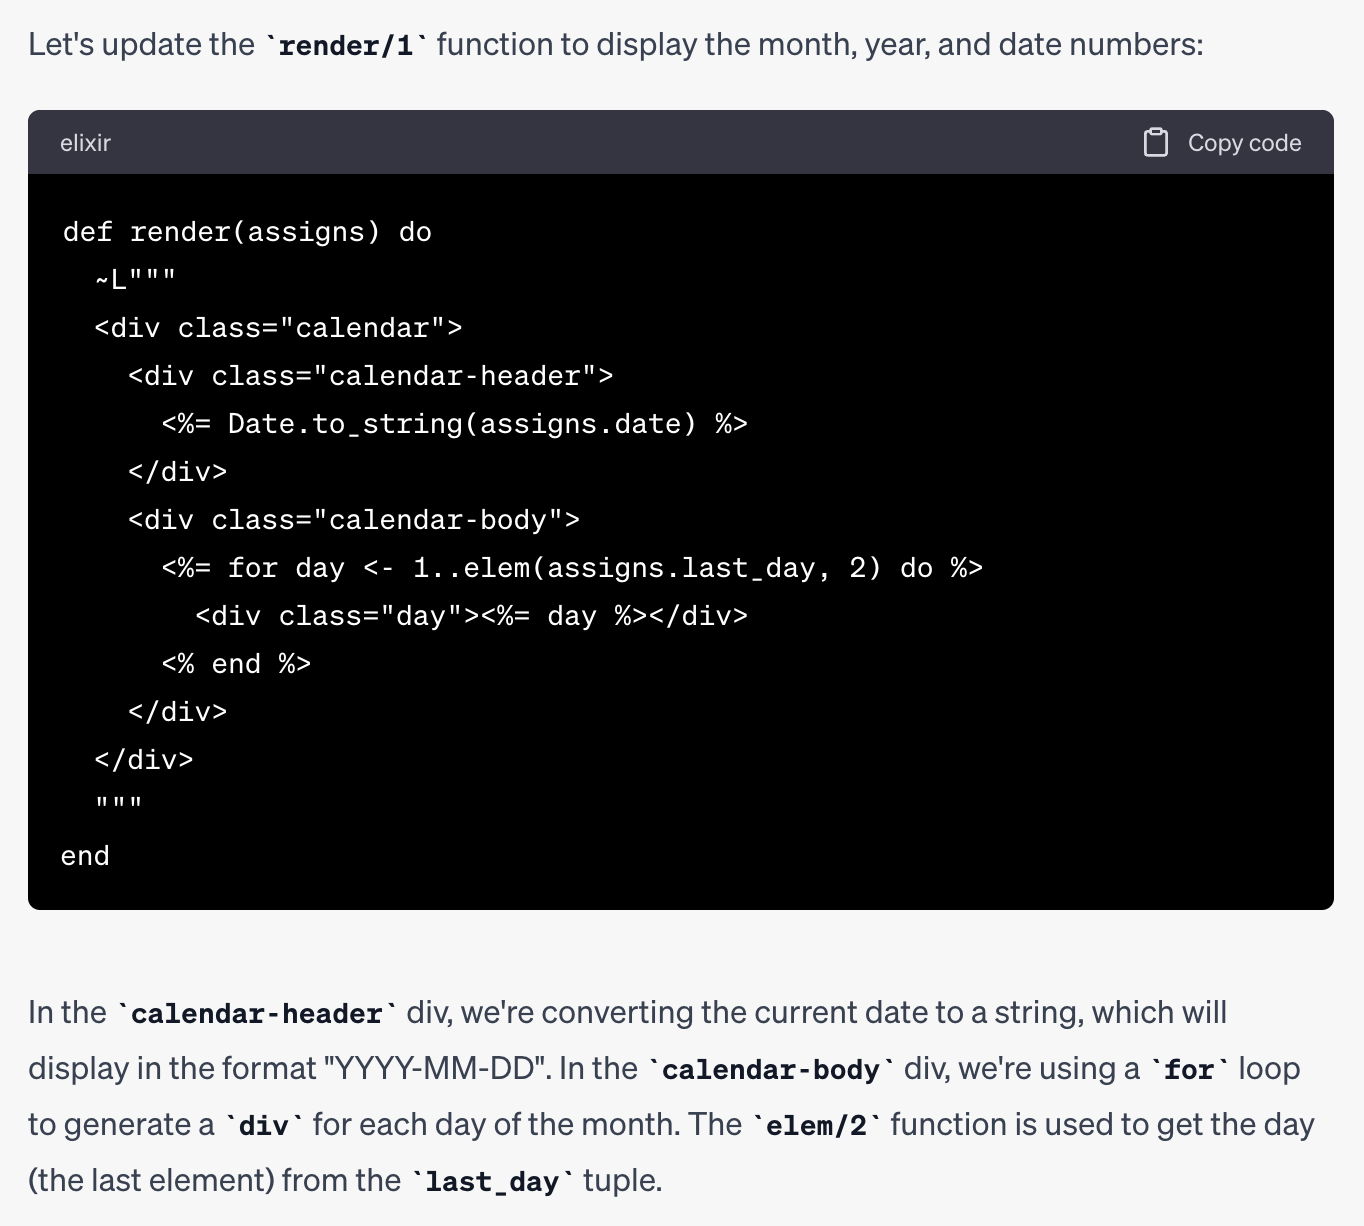
For the sake of the experiment, I also asked for this initial task without providing a list of things to respond to. Still, the output is poorer regarding “the expected amount of work done” (it tends to be more of a discussion between server-side rendered and javascript components, not relevant to us at all). I’m happy with specifying the scope and steps as we did, although the response was pretty long and with different versions of each part of the component module. At the end, I’ve taken a mix: the markup code from response number 2 and the logic from response number 3.
Sharing current information with the chat
Expected given my little experience programming with ChatGPT, the code didn’t work well on the first try. I quickly spotted it was using LEEx instead of the newer HEEx format in the render function. It is not a surprise since ChatGPT is limited to information available until 2021, and it was the year when the Phoenix framework introduced HEEx. So, we need the chat to “learn” about modern LiveView, so we ask him to provide a refined version of the code explicitly:

The answer summarized what the chat learned by reading the documentation. It also returned almost the same code for the render function code but using ~H instead of ~L. This interaction seems pointless, but it could help the tool keep context for future interactions, leading to answers with better accuracy in the following rounds.
At this point, I decided to enter manual mode. It was essential to work a little bit in sorting the mess. Taking complete control and ownership of the code is wise, which meant reviewing and testing it until I understood and trusted what we had done.
One interesting error was the code provided included three arguments for the render function instead of only one. This confusion happens to me often while working with LiveView views and components modules so that I won’t complain much in ChatGPT 😀, but it could take some time to spot when others (people or machines!) create the code.
Asking for the most useful assistance
Using ChatGPT for programming is better suited for things you’re not very good at or code that could take a significant portion of your energy. It happens to me when I have to write much of HTML markup and CSS styling. At the same time, the output could be much more accurate with this type of code because, compared with Elixir code, the chat likely was trained with many more examples of HTML/CSS.
I designed the prompt, including what I have done, so it considers my current code. Then I wrote two specific requirements to fulfill.
Here is my current version of the render function:

<Current code pasted here>

Things to do:

1) Using tailwind classes, style the elements to look like a table. Where the days
numbers are aligned to the proper days of the week.
Here you can rely on the fact that Jun 1 was Thursday.

2) Fill "blank spaces" with days from previous and next month,
having a different text color (gray tone).
You may want to assume that the previous month is May which has 31 days.
The response was constructive. It provided me with a table implemented with regular div blocks and using flex, so it was good enough to work with. The widget looked, for the first time, like a calendar:
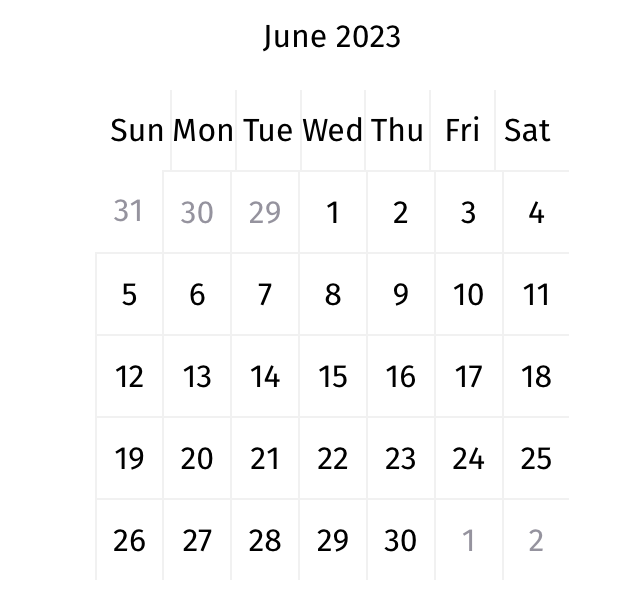
It did a decent job generating the calendar of the current month, Jun 2023. There is a mistake with the day of the first day of the month, which should be Thursday instead of Wednesday, but not a big deal.
What’s next?
If you want to know how I finished the Calendar component implementation, check Part 2.
See you there! 👋🏼

Header image credits: Photo taken from https://www.pxfuel.com/
Meme credits: Imgflip Meme Generator